So you want to make 3D models come to life? 🚀 Then you came to the right place.
Here you'll learn how to upload your 3D models, so you can project them on any image you want using the AR Marker content block .
Exporting as GLB/glTF
To upload a 3D model to the builder, you'll first need a 3D model in a GLB or glTF format. We'll show you how to export your 3D model to this format using Blender, but you can also export to GLB and glTF in Blender.

- To start you need to select all the parts of the model you want to export.
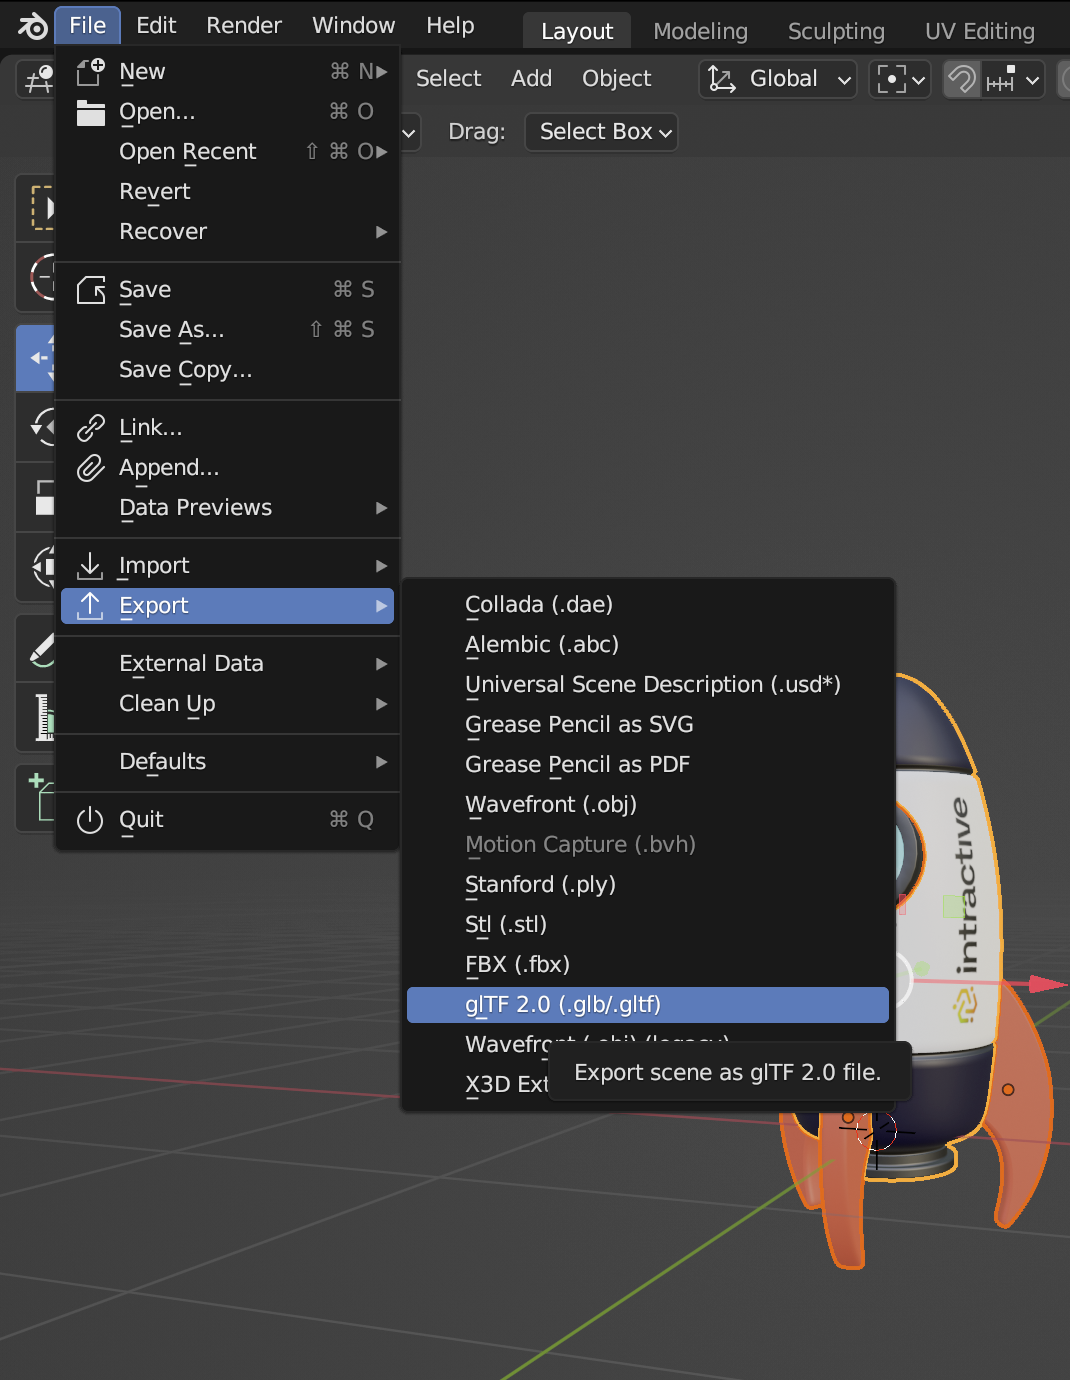
- Click on 'File → Export → glTF 2.0' as shown above.
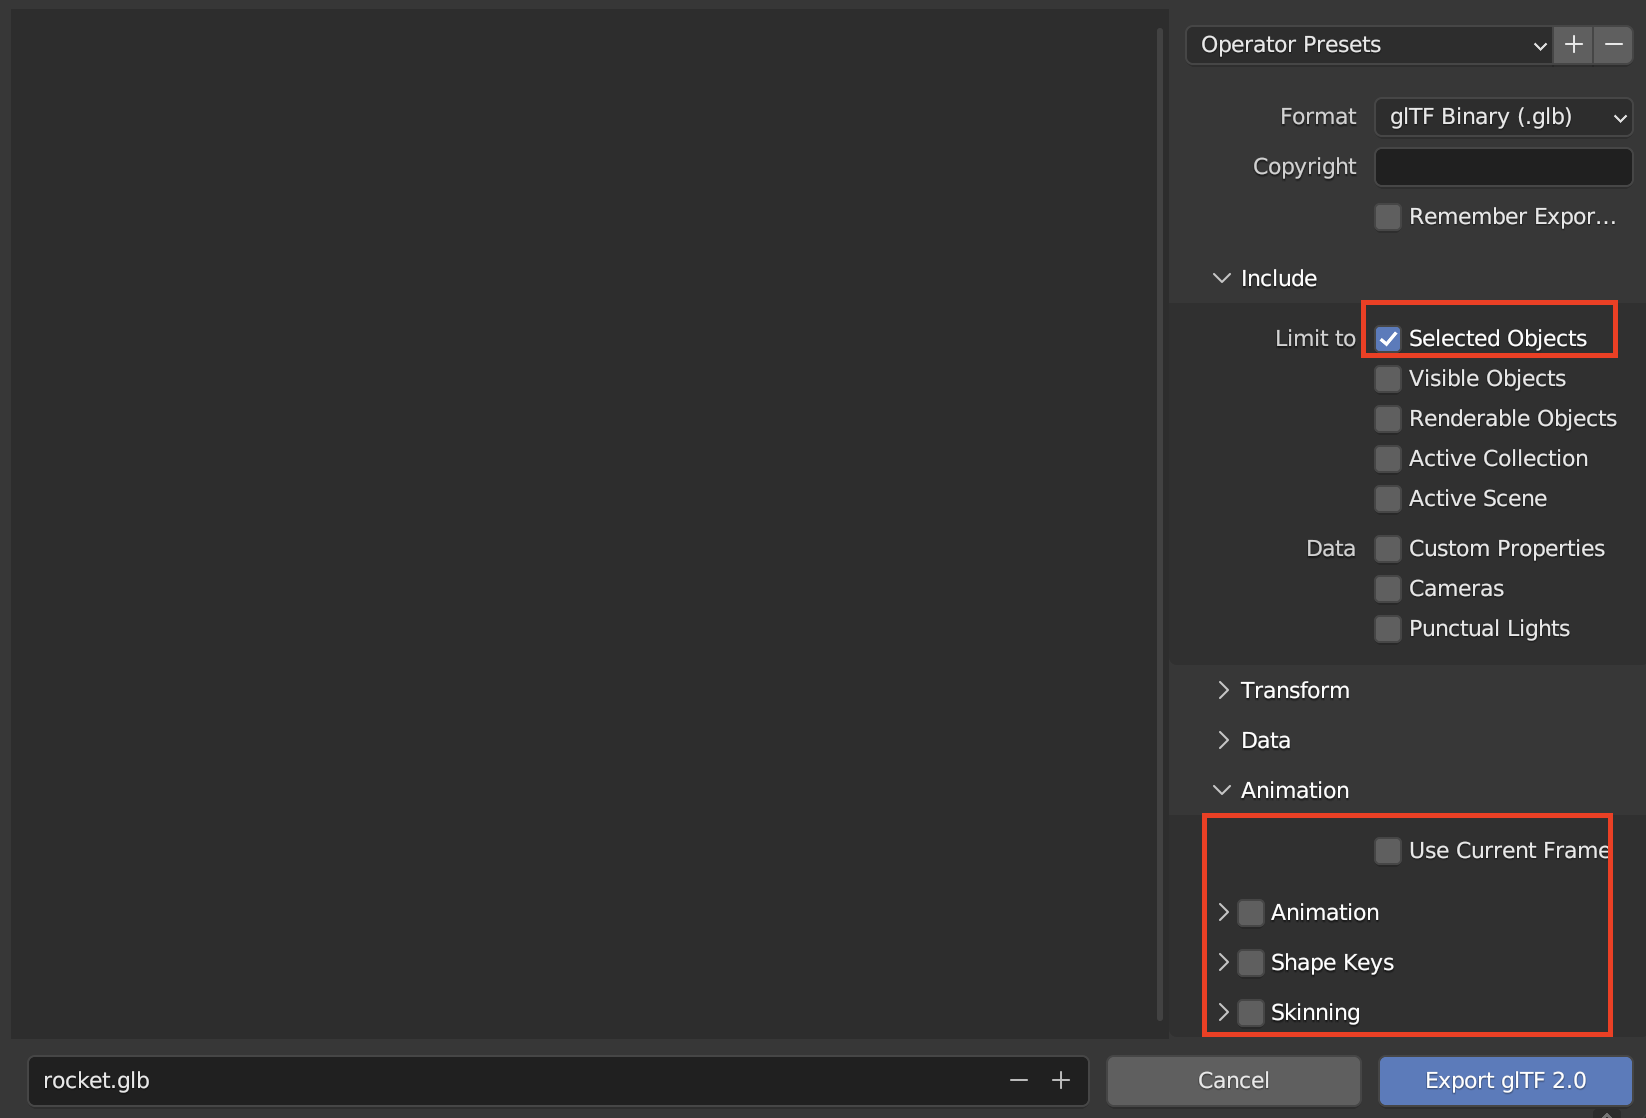
- Check 'Selected Objects' and deselect everything under 'Animation'.
- Click 'Export glTF 2.0' and you're all done!
Uploading a 3D model
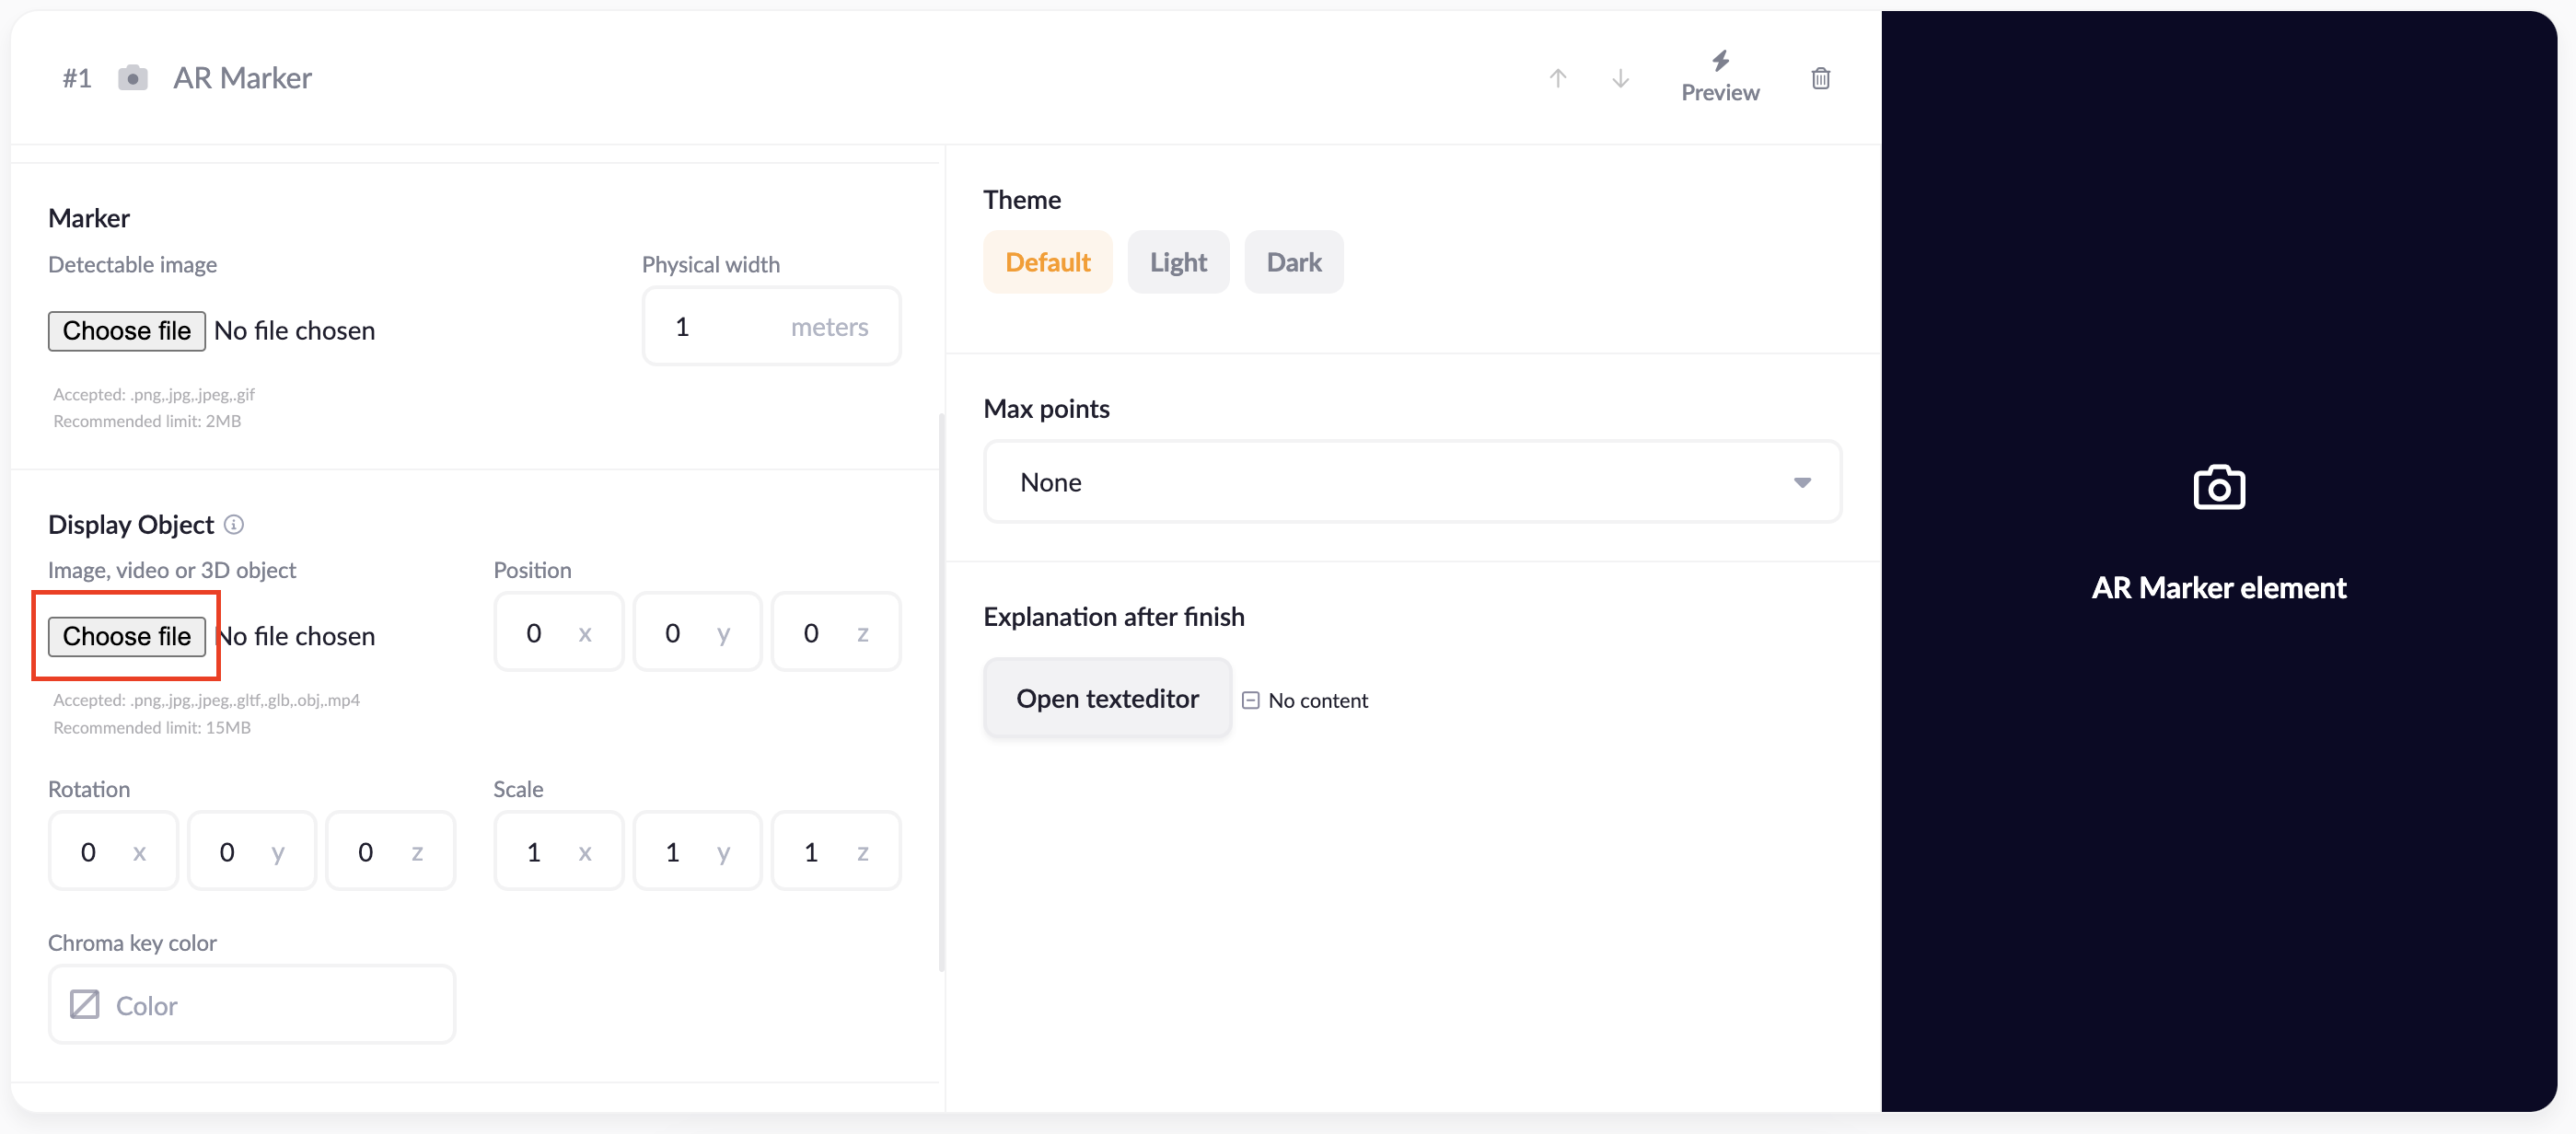
Click on 'Choose file' to upload the 3D model.
Preview
For this version of the builder, the position, rotation and scale may not work as expected. It is best to change these parameters in the 3D modelling software.
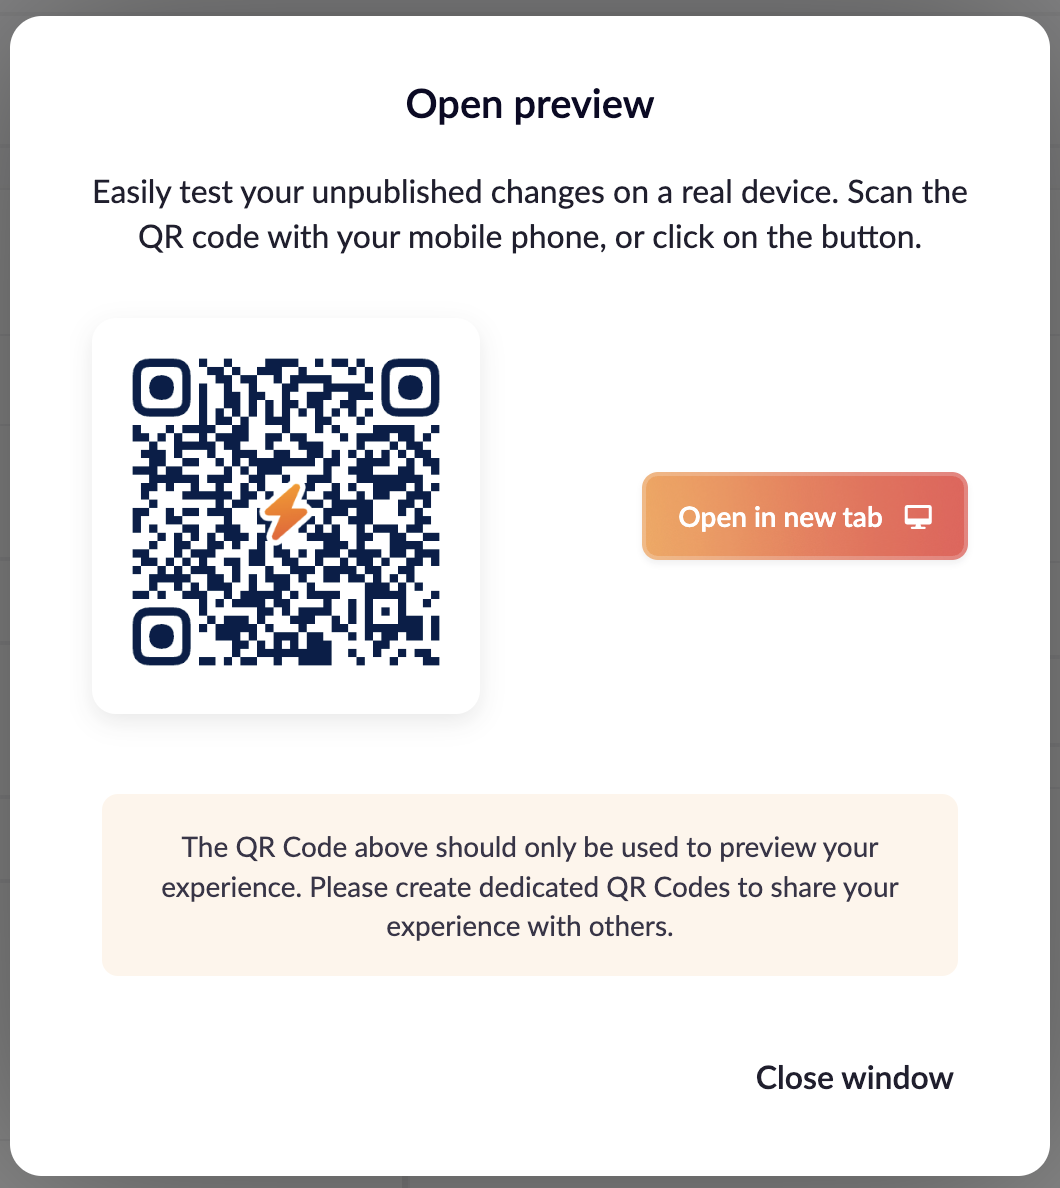
You can view the 3D model by clicking preview. Scan the code on your phone to test it on the uploaded marker image, or open in a new tab to see the 3D model in 3D space.